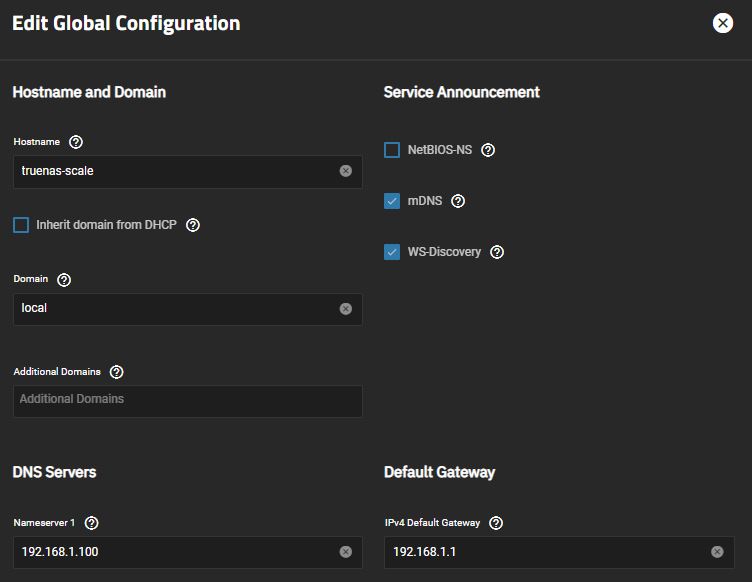
When TrueNAS SCALE is first installed, it uses a dynamic or DHCP address. In almost all situations you will want to use a static IP address. Normally you would go to the interface configuration, disable DHCP, supply an IP address, the gateway and DNS addresses. Before TrueNAS SCALE implements the networking changes, it will test the changes to make sure it is correct.
Unfortunately, if you do this, the test will fail because the gateway has not been set yet, so it reverts your changes. Here is the proper order to change from DHCP to a static IP address.
- Click on Network, then edit the “Global Configuration” by clicking on “Settings”.
- Under “Default Gateway”, add the gateway IP address and press “Save”
- Now under Network, click on the interface you want to use.
- Uncheck DHCP.
- Add the IP address for a nameserver (DNS) and the Default Gateway.
- At the bottom of the page is “Aliases”. (Strange name) Click on Add and add the static IP address and the CIDR netmask. Press Save.
- On the next screen, a banner will be displayed telling you to test the connection. If all is well, you will be prompted to “Save Changes” and the settings will be accepted.


